

Hey there, welcome back to Vanilla Spice!
Today we’re diving into how to post a group notice – a super handy skill, especially if you’re a host or DJ. But honestly? Even if that’s not your jam (yet), this might come in handy one day.
Before we jump in, just a quick heads-up: this tutorial is made using the Firestorm Viewer. Now, your viewer is totally your call – go with whatever works best for you. But if you don’t have Firestorm and you’d like to try it, you can grab it at www.firestormviewer.org or just give it a quick Google. Just make sure to download it from the official site to keep your account safe and sound.
Alright, ready? Let’s get into it!
There’s more than one way to get to the Group Profile tab to post your notice – and we’ve got you covered on both! Let’s walk through each option so you can pick the one that feels easiest for you.
Let’s start with getting that People tool up and running!
First, click the People button on your toolbar.
![]()
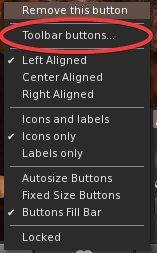
Don’t see it there? No worries – we’ll fix that real quick.
Just right-click anywhere on your bottom toolbar. A little menu will pop up. Click the second option down: Toolbar Buttons.
Now scroll through and find the People button.
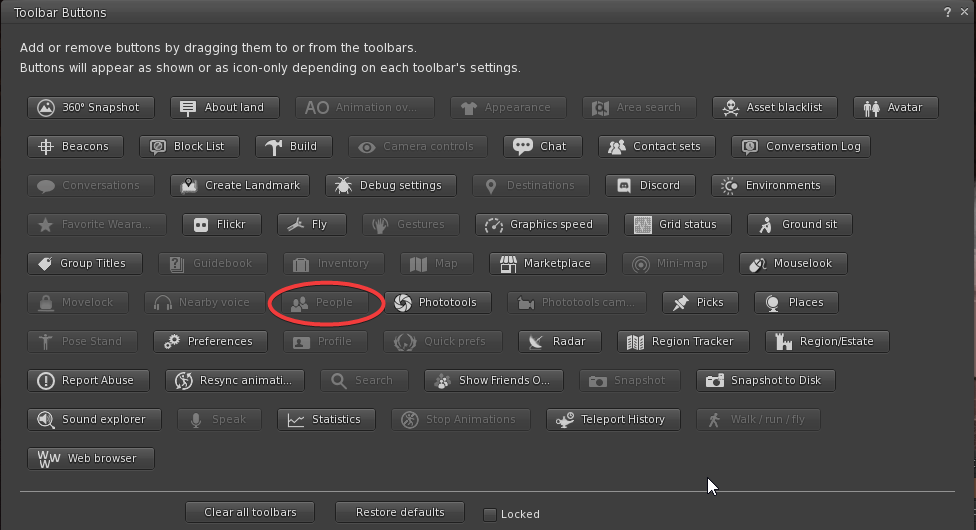
Got it? Left-click and drag it onto your toolbar so it’s ready for next time. Easy!
Now that it’s there:
Click the People button, then look at the top of the window and click the third tab: Groups.
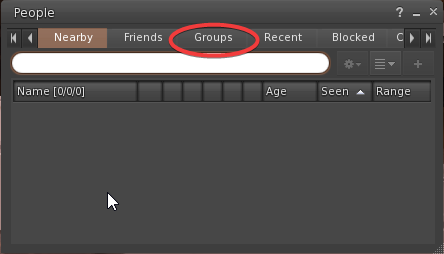
This brings up a list of all your groups. Scroll through until you spot the one you want to post in.
Hover your mouse over that group name, and voilà – some little icons appear to the right.
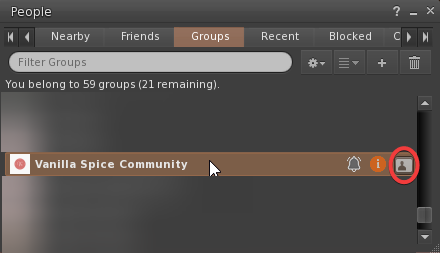
Click View Profile, and you’re in!
Alright, on to Method #2 – because hey, options are nice!
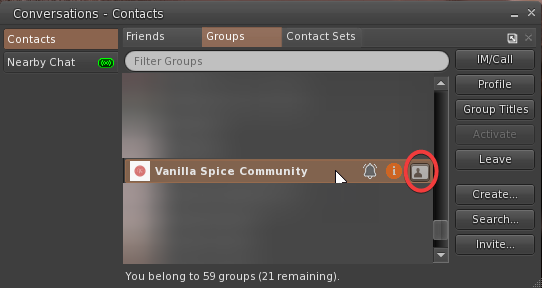
This time we’re using the Conversations window. It might already be open on your screen, but if it’s playing hide-and-seek…
Look for the Conversations button on your toolbar and left-click to pop it open.
Once you’re in, click the Contacts tab inside the window.

At the top of that section, you’ll see a few options – go ahead and choose Groups.

Just like before:
You’ll see your list of groups. Scroll until you find the one you want to post in.
Hover over the group name to make those sneaky little icons show up on the right.
Click View Profile – and just like that, you’re ready to post your notice!
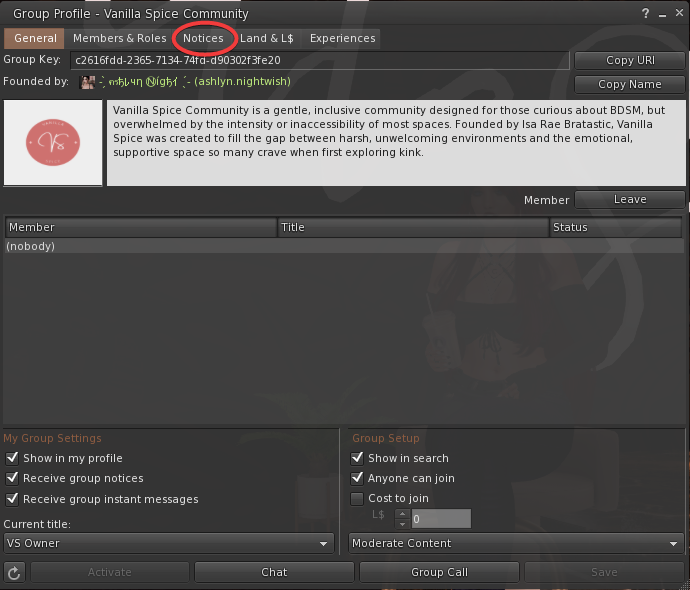
Now that you’ve made it to the Group Profile – no matter which path you took – the steps from here are exactly the same. Easy peasy!
At the top of the Group Profile window, you’ll see a row of tabs – click on the third one, Notices. If this is your first time here, take a moment to poke around and get comfy. The top part of the window shows past notices (they stick around for up to 14 days, with a cap of 200 per day). When you’re ready to create your own, look for and click the + New Notice button to get started.
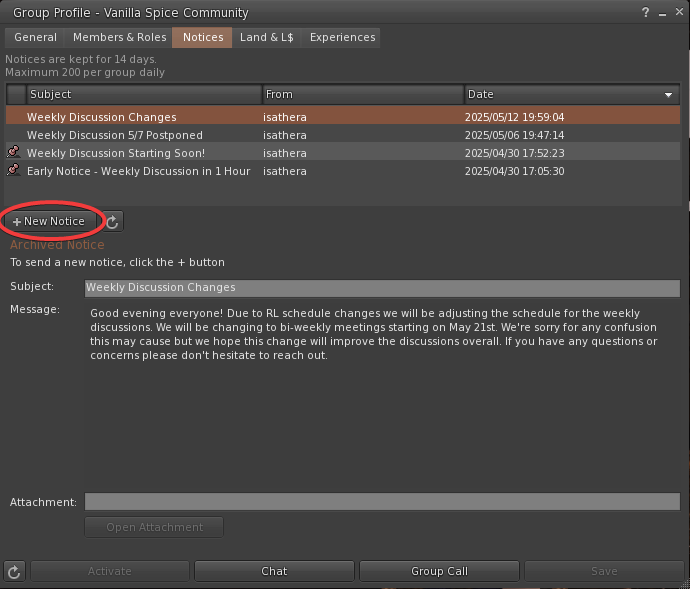
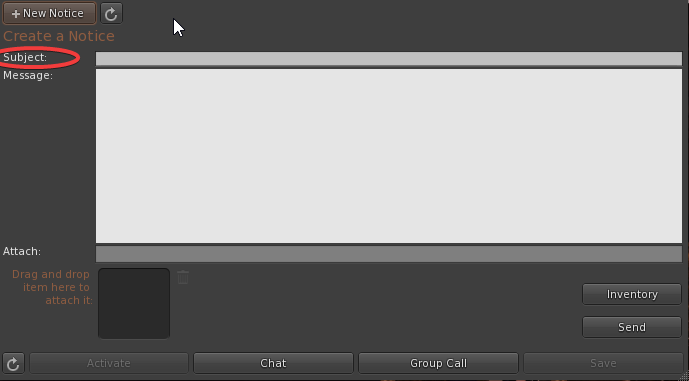
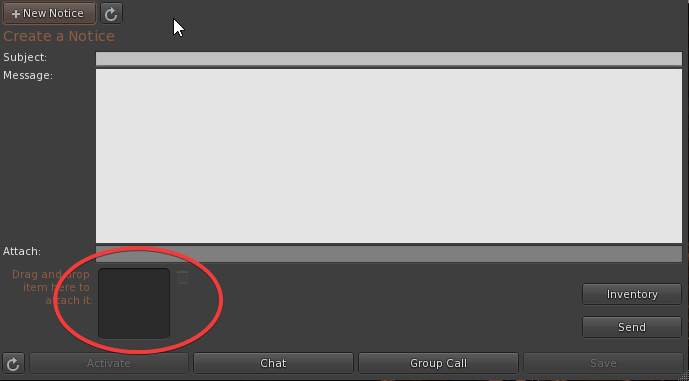
Now just fill out each section of your notice – don’t skip the Subject line (it’s the first thing folks will see!). If your event has a location, go ahead and add a landmark too: just find it in your inventory and drag it into the little box at the bottom left of the window.
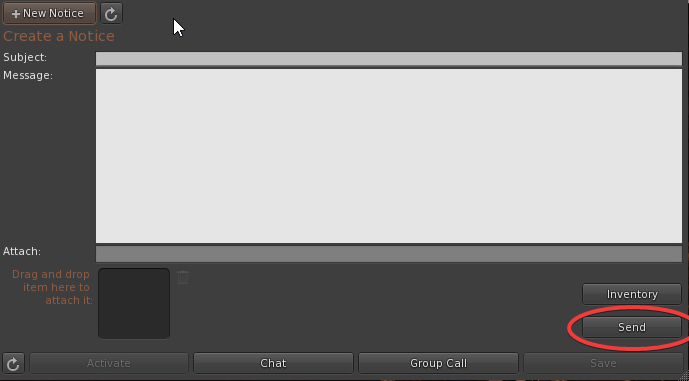
Once everything looks good, double-check it one more time… and then click Send down in the bottom-right corner. (Careful not to hit Save instead – it’s sneaky and not what you want!)
And that’s it – you did it! Your notice is out in the world, ready to sparkle. You can go ahead and close the window now, grab a sip of something tasty, and give yourself a little high-five. Nicely done!
If you ever get stuck or have questions, don’t be shy – reach out to a staff member or mentor. We’re always happy to help!
~Vanilla Spice Staff